You might hear your car making strange sounds when you press the brakes. This sound is called brake noise. Our article will show you why this happens and how to fix it. Keep reading to learn more.
Table of Contents
ToggleWorn Brake Pads
Worn brake pads make your car’s brakes squeal. You need to replace these pads to stop the noise and keep driving safely.
How Wear Indicators Cause Squealing Noises
Brake pads come with wear indicators that make a high-pitch sound when it’s time to replace them. These are small metal parts that touch the brake disc and squeal when your pad thickness gets too low.
This noise is a clear sign you need new brake pads. It protects you by preventing damage before the pads wear down completely and start grinding metal on metal.
I found this out the hard way driving my own car. The squealing started quietly at first, then got louder every day. At first, I thought it was just a temporary noise, but soon learned about wear indicators during a trip to the auto shop for service.
The mechanic showed me how thin my brake pads had gotten and explained how these metal tabs saved me from bigger repair bills by warning me early on.
Why Worn Pads Can Lead to Metal-on-Metal Grinding
Worn pads result in metal-on-metal grinding because the brake material wears away. This leaves the metal backing plate of the pad to rub against the brake disc. This rubbing creates a loud grinding noise.
It signals that you are no longer just wearing down your pads, but also damaging your discs.
Ignoring this sound can lead to more costly repairs.
As pads wear thin, their ability to stop your car decreases. The grinding noise is a clear sign that your brakes need attention. Waiting too long can harm other parts of your brake system like calipers and hoses.
Quick action will save money and keep you safe on the road.
Solution: Replacing Brake Pads
Replacing brake pads is essential for preventing brake noise and ensuring your vehicle stops safely. Here are steps to do it right:
- Buy the correct brake pads for your car. Check the vehicle’s manual or ask a professional to make sure you get the right type.
- Gather your tools. You will need a lug wrench, car jack, jack stands, a c-clamp or caliper piston tool, and a wrench set.
- Loosen the lug nuts on your wheels slightly before you lift the car. This makes removing them easier after the car is up.
- Use the car jack to lift your vehicle. Then, place it securely on jack stands to keep it raised while you work.
- Remove the lug nuts and take off the wheel to access the brake caliper.
- Take out the caliper bolts and carefully slide the caliper off the brake rotor without damaging the brake line.
- Remove old brake pads from the caliper bracket, noting how they fit in so you can put in new ones correctly.
- Compress the caliper piston with a c-clamp or special tool to make room for new, thicker pads.
- Install new brake pads into the caliper bracket exactly how you removed them.
10.Tighten all bolts securely and reattach wheel using lug nuts but don’t tighten completely yet.
11.Lower your car safely off of jack stands using car jack.
12.Tighten lug nuts fully once car is stable on ground.
13.Repeat process on other wheels if replacing more than one set of pads.
14.Test brakes gently in a safe area without traffic to ensure everything works well before normal driving.
Always refer to specific instructions for your vehicle model as some may require additional steps or precautions during this process
Glazed Brake Pads and Rotors
Glazed brake pads and discs can cause your car to stop poorly. Overheating from hard braking makes them shiny and less effective.
How Overheating Causes Glazing
Excessive heat applied to your brakes could result in a problem known as glazing. This situation arises when the brake pads become extremely hot, causing their surface to turn shiny and hard.
The heat is generated from intense braking over extended periods or from a lack of proper cooling for the brakes. With the rise in temperature, the pad’s material starts to disintegrate, forming a slick layer that minimizes friction.
Reduced friction implies that your car may not halt as promptly or smoothly.
During my drive through hilly contours, I encountered this situation personally. Constant use of brakes without permitting them to cool initiated a glossy layer on the pads, leading to a drop in performance.
It’s akin to trying to reduce speed with diminished traction – it not only extends the stopping gap, but also escalitates the possibility of brake fade during critical moments.
Regular maintenance averts typical troubles. This phrase is particularly relevant to the upkeep of vehicle brakes and for avoidance of problems like glazing.
Identifying Glazed Surfaces by Appearance and Sound
You can spot glazed brake pads and rotors by their shiny surface. They look like glass. This means the brakes got too hot and now might not work well. You’ll also hear a distinct sound, different from normal brake noises.
Instead of squeaking or grinding, glazed components make a less obvious hissing noise when you use the brakes.
From my own experience fixing cars, I’ve found that pressing the brake pedal with glazed parts feels different too. The car takes longer to stop because the surface is too smooth to grab onto the rotor properly.
If your brakes start acting like this, it’s time to check them out for glazing.
Solution: Resurfacing or Replacing Pads and Rotors
Glazed brake pads and rotors can make your car’s braking system noisy. If cleaning doesn’t fix the problem, you might need to resurface or replace these parts.
- Check your vehicle’s service manual for specifications on pads and rotors thickness. This tells you if resurfacing is possible or if you need new ones.
- Visit a trusted auto repair shop. They use precision tools to measure wear and damage.
- For resurfacing, professionals will use a lathe to remove a thin layer from the rotor’s surface, making it smooth again.
- Replacing involves removing the old pads and rotors and installing new ones that match your vehicle’s requirements.
- Ensure all replaced components are of high quality for longer life and better performance.
- After replacing or resurfacing, mechanics perform a bedding-in process. This aligns the pad material with the rotor surface for noise reduction.
- Ask for high-temperature brake lubricant on caliper slides and contact points to prevent future squeaking.
Following these steps reduces brake noise and restores optimal braking function to your vehicle, ensuring safety on the road.
Lack of Lubrication on Brake Components
Lack of lubrication on brake parts makes them squeak. You need to put high-temperature grease on dry slider pins and back plates. This stops the noise and keeps brakes quiet. Read more to find out how this simple step can fix your noisy brakes.
Squeaking from Dry Caliper Slides and Backing Plates
Dry caliper slides and backing plates often squeak. This noise comes from a lack of lubrication. Your car’s brakes need this to move smoothly. Think of it like your skin needing lotion so it doesn’t get dry and crack.
You should use high-temperature brake grease on these parts. This keeps everything moving without noise. It’s like putting oil in your car’s engine; it helps everything run better.
Lubrication is key for quiet, smooth braking.
Why Lubrication is Essential for Quiet Braking
Lubrication keeps brakes silent by preventing metal parts from rubbing directly against each other. Apply high-temperature brake lubricant to caliper slides and backing plates. This reduces squeaking noises during braking.
Without proper lubrication, your vehicle might make loud sounds when you try to stop it. Brakes work better and quieter with the right lube.
Using the correct lubricant is key for brake maintenance. It helps every part move smoothly and stops unwanted noise. Make sure to apply it on the right spots during brake service for efficient, quiet stops every time.
Solution: Applying High-Temperature Brake Lubricant
Applying high-temperature brake lubricant helps your brakes work quietly and smoothly. This step is important for maintaining your vehicle’s braking system.
- First, gather the right tools: You’ll need a jack, jack stands, and a lug wrench to access the brakes. Get a high-temperature brake lubricant designed for this use.
- Next, safely raise your car: Use the jack to lift your car, then secure it with jack stands. Never work under a car held up only by a jack.
- Remove the wheel: Loosen the lug nuts with your wrench, take off the wheel, and you’ll see the brake components.
- Identify brake parts that need lubricant: Look at the caliper slides and backing plates. These parts should not be dry.
- Clean any dirt or rust off these parts: Use a brush or cloth to make sure they’re clean before applying lubricant.
- Apply lubricant sparingly: Put a small amount of high-temperature brake lubricant on the caliper slides and backing plates. Don’t get any on the brake pads or rotors.
- Replace the wheel and lower your car: After lubricating, put back the wheel. Tighten the lug nuts securely, then lower your car safely from the jack stands.
This process reduces squeaking from dry components in your brake system. Regular checks during vehicle troubleshooting can prevent noise and ensure smooth braking.
Contaminants on Brake Pads or Rotors
Dirt, oil, or grease on your brake pads or drums can make high-pitched squeals when you stop. Clean these parts with a cleaner made for brakes to fix the noise.
Dirt, Oil, or Grease Causing High-Pitched Squeals
Oil, dirt, or grease on your brake pads or rotors can make high-pitched squeals when you brake. These contaminants interfere with the normal contact between the brake pad and rotor.
This creates a loud noise every time you use your brakes. Think about how these substances get there: leaking fluids from your car, dirty roads, or even regular wear and tear.
To fix this issue, clean the contaminated surfaces with a good quality brake cleaner. Spray it directly onto the affected areas to dissolve and remove unwanted grime. I had to do this once after driving through muddy water that splashed all over my brakes.
After cleaning them thoroughly, the annoying squeal stopped. Always check for leaks that could cause further contamination down the line.
How to Properly Clean Contaminated Brake Surfaces
First, you need to acquire brake cleaner and a clean cloth. Apply the brake cleaner on the dirty brake surfaces like pads or rotors. Allow it to sit for a few moments without letting it dry entirely.
Subsequently, calmly but securely wipe down the surfaces with your cloth to dislodge dirt, oil, or grease that can cause squealing noises.
I recall a time when a high-pitched squeal from my car led me to clean my brakes. This method didn’t just sort out the noise, it also greatly optimized my braking function. After cleaning, always make a point to assess your brakes’ condition and replace them if they’re too frayed or damaged beyond cleaning.
This will ensure a safe driving environment and maintain your brakes in a quiet condition.
Solution: Using Brake Cleaner to Remove Contaminants
Contaminants like dust, oil, or grease on your brake pads or rotors can cause squealing noises. To fix this, you need to clean these parts well. Here’s how to use brake cleaner for removing contaminants:
- Buy a good quality brake cleaner from an auto parts store.
- Make sure your car is parked on a level surface and the engine is off.
- Wear safety gloves and goggles to protect yourself from chemicals.
- Take off the wheel to reach the brake pads and rotors.
- Apply the brake cleaner generously onto the contaminated areas.
- Wait a few minutes for the cleaner to dissolve the grime.
- Use a clean rag to wipe off the dirt and dissolved contaminants.
- Spray again if some dirt still sticks on the surfaces.
- Let everything dry completely before you put back the wheel.
Using brake cleaner helps keep your brakes quiet and efficient. This method gets rid of harmful contaminants without harming your brake components.
Loose or Worn Brake Hardware
Loose or worn brake hardware, like caliper brackets and clips, can make your brakes rattle. Check these parts during a brake inspection to ensure they are tight and in good shape.
Rattling Noises from Loose Caliper Brackets or Clips
Caliper brackets or clips that come loose can make your brakes rattle. This happens because these parts help hold the brake pads securely against the rotors. If they are not tight, parts of the brake system move more than they should.
You hear a rattling sound when driving, especially when going over bumps or during turns.
If you hear this noise, check your brakes soon. Loose parts can lead to bigger problems with braking performance. For checking and fixing this issue, you might need tools like wrenches and screwdrivers.
You could also need new caliper brackets or clips if yours are too worn out to tighten properly again. Fixing this problem early stops it from getting worse and keeps your car safe on the road.
Diagnosing Hardware Issues During Brake Inspections
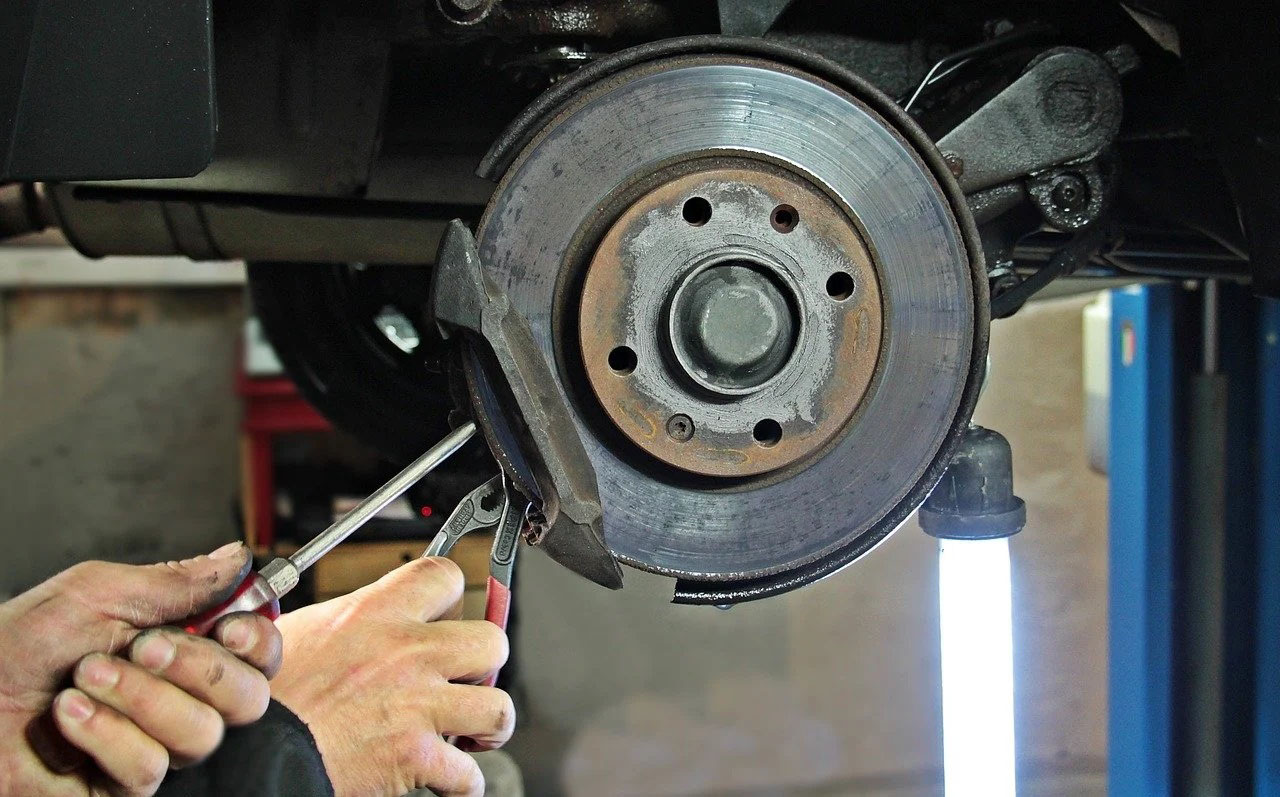
During brake inspections, you check for hardware problems that might cause noise. Loose caliper brackets or damaged clips often lead to rattling sounds. First, you need to lift your car safely and remove the wheels.
This gives you full access to the brakes. Look closely at the brake pads, rotors, and all connecting parts.
Always inspect every part of your brake system.
Use a flashlight to spot rust or wear on metal parts like caliper brackets and clips. If these parts look worn or loose, they could be why your brakes make noise. Replacing them can fix the issue and stop the unwanted sound.
You also should feel each component. Sometimes things look fine but are not secure when you touch them. Tightening everything might solve the problem without needing new parts.
Solution: Replacing Worn or Damaged Hardware
Noise from brakes often means it’s time to check the hardware. Worn or damaged parts can cause serious problems.
- First, find out which parts are bad. You might need new caliper brackets, clips, or pins.
- Get the right tools for the job. You’ll need a wrench set, and maybe a screwdriver or pliers.
- Take off the wheel to see the brakes better. Use a jack to lift the car safely.
- Remove the old brake hardware carefully. Don’t lose any small parts.
- Compare new hardware with old ones to make sure they match.
- Put in new clips or pins where needed. Make sure they fit snugly.
- Apply brake lubricant to parts that move or touch each other but avoid getting it on the brake pads or rotors.
- Reattach the caliper over the brake pads and rotor.
- Put back the wheel and lower your car down from the jack stand.
- Test your brakes at a low speed to make sure there’s no noise.
Changing worn hardware helps your brakes work well and quietly. Always check your car’s manual or ask a professional if you’re not sure how to replace parts correctly.
Conclusion
Understanding what causes brake noise helps you fix your car better. Worn pads, glazed surfaces, dry parts, dirt, and loose pieces all make brakes noisy. You learned how to spot these problems and fix them.
Now you know what to do next time your brakes squeak or grind. Keep an eye on your brake health for a safer drive.
FAQs
What are some common causes of brake noise?
Noise in brakes often comes from worn brake components, such as pads or drums. This wear can lead to squeaking or grinding sounds. Brake dust buildup on disc brakes or drum brakes can also cause these noises.
How do I identify the source of my brake’s squeaking?
To identify sources of brake squeaking, you need to inspect your automotive’s braking system thoroughly. Check for signs of brake pad wear and examine the condition of the disc brakes, drum brakes, and even the brake lines.
Why do my car’s brakes grind sometimes?
Grinding noises from your car’s brakes could indicate severe wear and tear on your brake components – especially if it is not intermittent but constant sound. It’s crucial to get an automotive repair professional to diagnose this issue promptly.
What should I do when there are intermittent sounds coming from my car’s braking system?
Intermittent sounds from your braking system may be due to varying degrees of pad wear or inconsistencies in your disc or drum surfaces. Consulting with a professional for accurate diagnosing is recommended.


